지난 포스팅에서는 스코어 관리까지 다루어 보았다.
이제는 자동으로 타겟들이 생성되어 해당 타겟들을 다 없애면 클리어가 뜨게 하는 스테이지 진행 로직(?)을 만들어 볼까 한다.
사실 거창하게 말할 것 없이 그냥 스테이지 시작을 알려 주고 물체들을 소환 한 다음, 물체들을 다 제거하면 클리어 해 주는 매니저 코드를 만드는 것이라 생각하면 된다.
스테이지의 난이도를 결정하는 것은 타겟의 속도 뿐 아니라 환경이 빡세지는 것, 즉 총알 개수 제한량의 조절이라고 생각한다.
갑자기 왜 이런 말을 하게 되냐면, 스테이지 관련 코드를 추가하면서 총알 개수 제한 관련 코드도 추가 해 줄 예정이기 때문이다.
우선 StageManager.cs이다.
Manager 오브젝트에 추가 해 주어 전체적인 매니징을 담당해 준다.
using System.Collections;
using System.Collections.Generic;
using UnityEngine;
using UnityEngine.UI;
using System;

public class StageManager : MonoBehaviour
{
    float RandomFloatX, RandomFloatY; // 생성 위치

    public GameObject TargetPrefab1; // 타겟 1
    public GameObject TargetPrefab2; // 타겟 2
    public GameObject TargetPrefab3; // 타겟 3
    public GameObject Bomb1; // 폭탄 1
    private GameObject Target; // 동적으로 생성 된 타겟


    private List<String> Target1Name = new List<String>();
    private List<String> Bomb1Name = new List<String>();

    int remainTarget1 = -1; // 남은 타겟의 수를 실시간으로 갱신해 주기 위한 것, 이 것이 0이 되면 다음 스테이지로 간다.
    // -1 > 체크를 하지 않는 상태


    // Start is called before the first frame update
    void Start()
    {
        Stage1();
    }

    // Update is called once per frame
    void Update()
    {
        Stage1Check();
    }

    public void SpawnTarget1(int num)
    {
        UnityEngine.Random.InitState(DateTime.Now.Millisecond);
        RandomFloatX = UnityEngine.Random.Range(-8.2f, 8.4f);
        RandomFloatY = UnityEngine.Random.Range(-4.4f, 4.4f);

        Target = Instantiate(TargetPrefab1, new Vector2(RandomFloatX, RandomFloatY), Quaternion.identity) as GameObject;

        Target.name = "Target1_" + num; // 이름 + 숫자를 적용하여 이름 변경(스테이지 초기화 시 마다 숫자 초기화)
        Target1Name.Add(Target.name); // 리스트에 저장(게임 오버시에나 폭탄이 남았을 때 제거하기 위함)

        if (RandomFloatX > 0)
            Target.GetComponent<Rigidbody2D>().AddForce(new Vector2(-500, 0));
        else
            Target.GetComponent<Rigidbody2D>().AddForce(new Vector2(500, 0));
    }

    public void SpawnBomb1(int num)
    {
        UnityEngine.Random.InitState(DateTime.Now.Millisecond);
        RandomFloatX = UnityEngine.Random.Range(-8.2f, 8.4f);
        RandomFloatY = UnityEngine.Random.Range(-4.4f, 4.4f);

        Target = Instantiate(Bomb1, new Vector2(RandomFloatX, RandomFloatY), Quaternion.identity) as GameObject;

        Target.name = "Bomb1_" + num; // 이름 + 숫자를 적용하여 이름 변경(스테이지 초기화 시 마다 숫자 초기화)
        Bomb1Name.Add(Target.name); // 리스트에 저장(게임 오버시에나 폭탄이 남았을 때 제거하기 위함)

        if (RandomFloatX > 0)
            Target.GetComponent<Rigidbody2D>().AddForce(new Vector2(-500, 0));
        else
            Target.GetComponent<Rigidbody2D>().AddForce(new Vector2(500, 0));
    }

    public void Stage1()
    {
        remainTarget1 = 10;
        for(int i = 0; i < 10; i++)
        {
            SpawnTarget1(i); // 타겟 10개 소환
            Debug.Log("타겟" + i + "개 소환");
            if (i < 5) // 폭탄 5개 소환
                SpawnBomb1(i);
        }

    }

    public void Stage1Check()
    {
        if(remainTarget1 == 0)
        {
            Debug.Log("스테이지 1 클리어! 폭탄을 제거합니다.");
            for(int i = 0; i < Bomb1Name.Count; i++)
            {
                try
                {
                    Destroy(GameObject.Find(Bomb1Name[i]));
                }
                catch
                {
                    Debug.Log("이미 맞춘 폭탄이 있어서 다음 것을 제거합니다!");
                    continue;
                }

            }
            Bomb1Name.Clear();
            Target1Name.Clear();

            remainTarget1 = -1; // checkOff상태로 변경!
        }
    }

    public void MinusTarget1()
    {
        remainTarget1--;
    }

}
우선 SpawnTarget1() 함수와 SpawnBomb1() 함수를 구분하여 제작하였으며, Stage별로 함수를 만들어 스테이지 시작을 전개하였다.
remainTarget1 변수를 만들고, MinusTarget1()을 만들어서 실시간으로 스테이지 클리어를 위한 남은 타겟 수를 관리하게 하였다.
그리고 스테이지 클리어 시, 남은 물체들을 다 제거 해 주기 위하여 객체들의 이름을 저장 할 List를 사용하였다.
또한, 남은 폭탄들은 이미 제거 된 것이 또 제거될 수 있기에 만일의 사태에 대비하여 try ~ catch 구문을 추가 해 주었다.
기존 코드 갱신 사항들
Target.cs 중 Update 부분
void Update()
    {
        if(hit == true)
        {
            if(this.tag == "Score1") // Tag Check
            {
                Target1_ani.SetTrigger("Destroy_Target1");

                Manager.GetComponent<StageManager>().MinusTarget1(); // 잡아야 하는 타겟의 수를 줄인다.
                Manager.GetComponent<ScoreManager>().SetOne();
                Destroy(gameObject);

            }
            else if(this.tag == "Minus1")
            {
                Manager.GetComponent<ScoreManager>().MinusOne();
                Destroy(gameObject);

            }

        }
    }
점수를 갱신하는 부분에서 스테이지 매니저 쪽에도 개수를 갱신시키는 함수를 같이 실행시킴으로써 스테이지 관리를 실시간으로 할 수 있게 하였다.
- 총알 개수 추가
이제, 최대 총알 개수를 제한 해 주는 코드를 작성 해 보도록 하자.
역시나 Manager 오브젝트에 넣어 줄 코드이며(만능인가..)
BulletManager.cs로 이름 지었다.
using System.Collections;
using System.Collections.Generic;
using UnityEngine;
using UnityEngine.UI;

public class BulletManager : MonoBehaviour
{
    int remainedBullet = 0;
    public Text bulletText;
    List<string> BulletImgName = new List<string>();
    public Image BulletImg;

    public GameObject UIBase;


    // Start is called before the first frame update
    void Start()
    {

    }

    // Update is called once per frame
    void Update()
    {
        bulletText.text = remainedBullet.ToString();
    }

    public void AddBullet(int count)
    {
        if(remainedBullet == 0)
        {
            BulletImgName.Clear();
            this.remainedBullet = count;
            SetBulletUI();
        }
        else
        {
            Debug.Log("총알이 다 떨어졌을 때 충전할 수 있습니다.");

        }

    }

    public void discountBullet(int count)
    {
        this.remainedBullet -= count;

        Destroy(GameObject.Find(BulletImgName[remainedBullet]));

    }

    public int GetBulletCount()
    {
        return this.remainedBullet;
    }

    public void SetBulletUI()
    {
        for(int i = 0; i < remainedBullet; i++)
        {
            Vector3 offSet = UIBase.transform.position + new Vector3(340 - i * 50, -160, 0);

            Image BulletImsi = Instantiate(BulletImg);
            BulletImsi.transform.SetParent(UIBase.transform,false);
            BulletImsi.name = "BulImge" + i;
            BulletImsi.transform.position = offSet;

            BulletImgName.Add(BulletImsi.name);

        }
    }

}
테스트용으로 총알 충전 버튼을 만들어 주었기에 관련 함수(AddBullet)를 만들어 주었지만 스테이지 시작 시에도 총알을 충전 해 주어야 하기 때문에 그대로 유지하였다.
그리고 아래 그림과 같이 총알을 나타내는 도트를 하나 만들어 주어, 화면 아래 쪽에 세팅 할 예정이다.
(UI Image에 Sprite로 추가 해 준 다음 Prefab화 시켜 준다.)

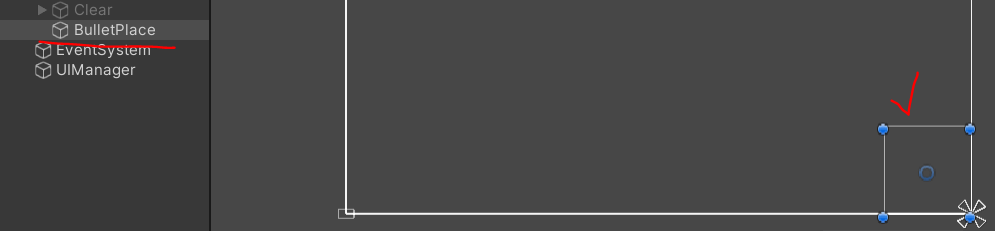
그러한 역할을 SetBulletUI()가 해 주며, 위 사진과 같이 빈 오브젝트를 총알 도트가 생성 될 곳에 위치시켜 두고, 부모 오브젝트로 설정 해 두게 되어 좌표 세팅을 상대적으로 쉽게 만들어 주었다.
( BulletImsi.transform.SetParent(UIBase.transform,false); 사용! )
또한, 폭탄들과 같이 스테이지 클리어 시 제거 해 주기 위해 ImgName을 List에 저장 해 두었다.
기존 코드 갱신
StageManager.cs에 추가 된 함수 GameOverCheck()
public void GameOverCheck()
    {
        if(remainTarget1 > 0 && (GetComponent<BulletManager>().GetBulletCount() == 0))
        {
            //타겟이 남았을 때 총알을 다 소비하였다면..!
            Debug.Log("총알을 다 소비하였습니다! 게임 오버!");

            GameOver.SetActive(true);

            for (int i = 0; i < Target1Name.Count; i++)
            {
                try
                {
                    Destroy(GameObject.Find(Target1Name[i]));
                }
                catch
                {
                    Debug.Log("맞춘 타겟이 있어서 스킵!");
                    continue;
                }

            }

            for (int i = 0; i < Bomb1Name.Count; i++)
            {
                try
                {
                    Destroy(GameObject.Find(Bomb1Name[i]));
                }
                catch
                {
                    Debug.Log("이미 맞춘 폭탄이 있어서 다음 것을 제거합니다!");
                    continue;
                }

            }
            Bomb1Name.Clear();
            Target1Name.Clear();

            remainTarget1 = -1; // checkOff상태로 변경!


            Invoke("BackToTheMap", 2); // 2초후 BackToTheMap 호출

        }
    }
대상 타겟을 다 제거하기 전에 총알이 다 떨어지게 되면 게임 오버를 출력하는 함수이다.
스테이지가 끝났기에 폭탄과 타겟을 제거 해 준다.
이렇게 해 주면 게임오버는 아래와 같은 화면이 나오게 될 것이다.

'유니티 > Hunting게임[2D]' 카테고리의 다른 글
| 2D 미니게임 만들기 연습 7 ] 추가 설정 사항(파괴 애니메이션, 버그 수정) (0) | 2022.08.25 |
|---|---|
| 2D 미니게임 만들기 연습 5 ] 스코어 관리 설정 (0) | 2022.08.24 |
| 2D 미니게임 연습 4 ] 물체 도트 디자인 (0) | 2022.08.24 |
| 2D 미니게임 만들기 연습 3 ] 물체에 움직임 부여하기 (0) | 2022.08.22 |
| 2D 미니게임 만들기 연습 2 ] 클릭시 반응하는 물체 만들기 (0) | 2022.08.17 |


