지난 포스팅에서는 타겟의 도트 디자인을 하게 되었다.
그런데 게임에 맞춰야 하는 것만 들어 가 있는 것은 너무 재미가 없을 것이다.
이에, 맞추지 말아야 할 것들도 추가 해 보도록 해 보자.
- 폭탄 디자인

원형의 물체에 해골을 그려 넣음으로써 딱 봐도 위험 해 보이는 것임을 직감할 수 있게 하였다.
이 곳에는 별개의 애니메이션 효과를 부여하지 않았다.
이것도 export 해 주어 Unity에 넣어 주도록 해 보자.
- 스코어 보드 관리
이제 기본적인 모양은 얼추 만들어졌다.
이제 타겟들의 종류도 여러 개가 되었으니(맞춰야 하는 타겟, 맞추지 말아야 하는 타겟) 이에 맞게 타겟에 대한 구분 및 스코어 관리를 해 보도록 하자
우선 스코어가 더해지는 과정은 아래 그림과 같이 된다.

Target을 맞추게 되면 Manager에 자신이 맞았다는 사실을 전달 해 주고, Manager는 맞은 타겟이 누구인지에 따라서 점수를 더해 주는 방식을 사용한다.
→ 여기서 Excel을 활용하여 파일로 스코어를 저장하는 것도 좋을 것 같고, 로그 파일에도 저장하여 일정 기간동안의 평균 점수 등을 저장하여 파일로 지속적으로 뽑아내게 되면 좋을 것 같다?
위 그림과 같이 되기 위해서는 Mouse 클릭 → 해당 타겟 속 코드에서 Manager에 타겟에 대한 정보 전달 후 Destroy 실행 → Manager에서 Score 보드에 점수 가/감산 의 과정이 필요하다.
그렇다면 MousePointer.cs 코드부터 수정해야 할 것이다.
using System.Collections;
using System.Collections.Generic;
using UnityEngine;

public class MousePointer : MonoBehaviour
{
    public GameObject pointerPrefab;
    private GameObject pointerRed;
    Vector3 mousePos;
    BulletManager bullet;


    // Start is called before the first frame update
    void Start()
    {
        pointerRed = Instantiate(pointerPrefab) as GameObject;
        bullet = GetComponent<BulletManager>();
        Cursor.visible = false;
    }

    // Update is called once per frame
    void Update()
    {
        mousePos = Input.mousePosition;
        mousePos = UnityEngine.Camera.main.ScreenToWorldPoint(mousePos);
        mousePos.z = -1;
        pointerRed.transform.position = mousePos;
        Ray2D ray = new Ray2D(mousePos, Vector2.zero); // 원점 ~ 포인터로 발사되는 레이저

        if (Input.GetMouseButtonDown(0))
        {
            //Debug.Log(mousePos);

            float distance = Mathf.Infinity; // Ray 내에서 감지할 최대 거리

            // RaycastHit2D hit = Physics2D.Raycast(ray.origin, ray.direction, distance); // 다 잡음
            RaycastHit2D hitDrawer = Physics2D.Raycast(ray.origin, ray.direction, distance, 1 << LayerMask.NameToLayer("Touchable")); // 1 << LayerMask.NameToLayer("Touchable") 대신 2048을 써도 됨

            if (hitDrawer) // 맞았을 때는 Stage에서 총알 차감!
            {
                Debug.Log("터치!");
                hitDrawer.collider.gameObject.GetComponent<Target>().beHit();
            }


        }

    }
}hitDrawer.collider.gameobject를 통하여 클릭하게 된 오브젝트 정보를 받을 수 있다. (타겟의 정보)
그 정보를 이용하여 타겟에 있는 Target.cs 코드를 작동시켜 준다.
Target.cs 코드는 아래와 같이 새로 만들었다.
using System.Collections;
using System.Collections.Generic;
using UnityEngine;

public class Target : MonoBehaviour
{
    bool hit = false; // 맞았는지 여부를 나타냄
    GameObject Manager;
    Animator Target1_ani;

    // Start is called before the first frame update
    void Start()
    {
        Manager = GameObject.Find("Manager");
        if (this.tag == "Score1")
        {
            Target1_ani = GetComponent<Animator>();
        }
    }

    // Update is called once per frame
    void Update()
    {
        if(hit == true)
        {
            if(this.tag == "Score1") // Tag Check
            {

                Manager.GetComponent<ScoreManager>().SetOne();
                Destroy(gameObject);

            }
            else if(this.tag == "Minus1")
            {
                Manager.GetComponent<ScoreManager>().MinusOne();

                Destroy(gameObject);

            }

        }

    }

    public void beHit()
    {
        hit = true;
    }

}
MousePointer.cs 에서 Target.cs에 있는 beHit() 함수를 작동시킴으로써 hit당했음을 알려주는 bool 함수를 true로 만들어 준다.
그 다음에 Update에서 hit가 true임을 감지하여 Manager의 ScoreManager.cs 에서의 함수를 작동시켜 준다.
여기서 대상 타겟의 Tag를 이용하여 가/감할 점수를 분기 해 준다.
ScoreManager.cs 의 함수를 작동시킨 다음 해당 오브젝트는 사라지게 된다.
ScoreManager.cs 코드이다.
using System;
using System.Collections;
using System.Collections.Generic;
using UnityEngine;
using UnityEngine.UI;

public class ScoreManager : MonoBehaviour
{
    int TargetNum = 0; // 맞춰진 타겟의 종류!
    int cntScore;

    public Text Score;

    // Start is called before the first frame update
    void Start()
    {

    }

    // Update is called once per frame
    void Update()
    {

        switch (TargetNum)
        {
            case -1:
                cntScore = int.Parse(Score.text);
                if (cntScore > 0)
                {
                    cntScore -= 1;
                    Score.text = cntScore.ToString();
                }
                TargetNum = 0;
                break;
            case 1:
                cntScore = int.Parse(Score.text);
                cntScore += 1;
                Score.text = cntScore.ToString();
                TargetNum = 0;
                break;
            case 2:
                cntScore = int.Parse(Score.text);
                cntScore += 2;
                Score.text = cntScore.ToString();
                TargetNum = 0;
                break;
        }

    }

    public void SetOne()
    {
        TargetNum = 1;
    }

    public void SetTwo()
    {
        TargetNum = 2;
    }

    public void MinusOne()
    {
        TargetNum = -1;
    }


}
이미 분기 된 점수를 적용 시켜 주는 단계이다.
이 곳에서 점수를 시각적으로 적용시켜 준다.
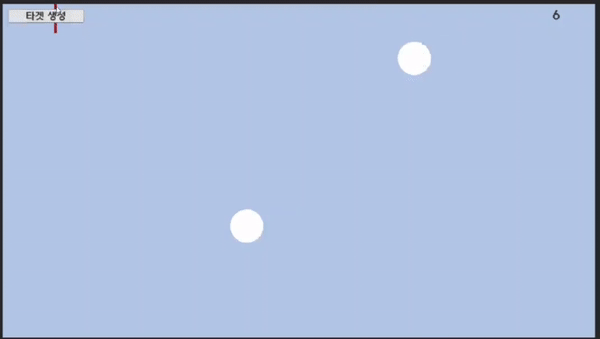
위 움짤을 보게 되면 도트 그래픽이 적용되기 전이지만 클릭했을 때, 점수가 증가하게 됨을 볼 수 있다.
'유니티 > Hunting게임[2D]' 카테고리의 다른 글
| 2D 미니게임 만들기 연습 7 ] 추가 설정 사항(파괴 애니메이션, 버그 수정) (0) | 2022.08.25 |
|---|---|
| 2D 미니게임 만들기 연습 6 ] 스테이지 관리 + 총알 개수 제한 (0) | 2022.08.24 |
| 2D 미니게임 연습 4 ] 물체 도트 디자인 (0) | 2022.08.24 |
| 2D 미니게임 만들기 연습 3 ] 물체에 움직임 부여하기 (0) | 2022.08.22 |
| 2D 미니게임 만들기 연습 2 ] 클릭시 반응하는 물체 만들기 (0) | 2022.08.17 |


